7 minutes
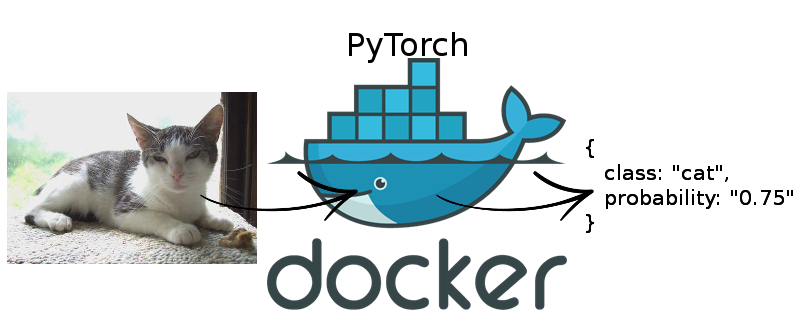
PyTorch GPU inference with Docker and Flask
GPU inference
In a previous article, I illustrated how to serve a PyTorch model in a serverless manner on AWS lambda. However, currently AWS lambda and other serverless compute functions usually run on the CPU. But what if you need to serve your machine learning model on the GPU during your inference and the CPU just doesn’t cut it?
In this article, I will show you how to use Docker to serve your PyTorch model for GPU inference and also provide it as a REST API. You can then use AWS API Gateway or any other service to handle authentication and security measures to serve this in production.
For the time being, I will simply show you the basics for the PyTorch inference part. In a further article, I might go deeper and show you how to combine this further with Docker Compose to spin up Nginx and Gunicorn to make this more scalable and production ready. If you are interested in this, please let me know and follow me on twitter: @mpaepper.
Although it doesn’t need GPU inference, I will stick with the CIFAR-10 image classification example of the previous blog post for simplicity.
Nvidia Docker
When we talk about GPUs, we usually are talking about Nvidia GPUs and the great thing is that Nvidia is providing Docker images which are ready to be used with GPUs, so there is no need to deal with all the CUDA stuff etc inside Docker.
What you need to do is to install CUDA on the machine on which you will have Docker running. That could be your local machine for development or a larger cloud instance or dedicated server for live inference.
I won’t go into detail of how to setup CUDA and the related drivers here as you most likely already did this. If not, refer to this: CUDA driver installation.
Next, we need to install nvidia-docker:
curl -s -L https://nvidia.github.io/nvidia-docker/gpgkey | sudo apt-key add -
distribution=$(. /etc/os-release;echo $ID$VERSION_ID)
curl -s -L https://nvidia.github.io/nvidia-docker/$distribution/nvidia-docker.list | sudo tee /etc/apt/sources.list.d/nvidia-docker.list
sudo apt-get update

sudo apt-get install -y nvidia-docker2
sudo pkill -SIGHUP dockerd

# Run a test
docker run --runtime=nvidia --rm nvidia/cuda:9.0-base nvidia-smi
The PyTorch Nvidia Docker Image
There are a few things to consider when choosing the correct Docker image to use:
The first is the PyTorch version you will be using. I want to use PyTorch version 1.0 or higher. The second thing is the CUDA version you have installed on the machine which will be running Docker. As the docker image is accessing CUDA on the host, that CUDA version needs to match with the docker image you are choosing.
To figure that out, the release version page can be used: Nvidia PyTorch docker releases. I will go with the newest version 19.04 which has PyTorch in version PyTorch 1.0.1commit 828a6a3b and requires CUDA release 418.xx.x+ or higher.
If you are unsure what you have installed, use the command nvidia-smi to figure it out:
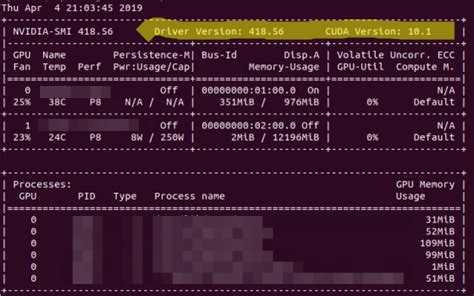
Example nvidia-smi output
Doing the inference with Flask
We somehow need to serve our Python CIFAR-10 prediction to answer requests. The simplest possible solution is to use Flask to do so. Assume we trained the CIFAR-10 model as explained in the previous blog post, so we have two files - our simplecifar_jit.pth which is the model definition with the weights and classes which contains the naming of our 10 numerical classes.
We’ll put both of these inside a folder called model.
Next, we need inference code which is able to use this model and a given image and come up with a result. Again, this is similar to the inference that I’ve written for our AWS lambda prediction service before (file prediction.py):
import os, io, json, tarfile, glob, time, logging, base64, boto3, PIL, torch
import torch.nn.functional as F
from torchvision import transforms

logger = logging.getLogger()
logger.setLevel(logging.INFO)


def load_model():
    model_dir = 'model'
    classes = open(f'{model_dir}/classes', 'r').read().splitlines()
    logger.info(f'Classes are {classes}')
    model_path = f'{model_dir}/simplecifar_jit.pth'
    logger.info(f'Model path is {model_path}')
    device = torch.device('cuda' if torch.cuda.is_available() else 'cpu')
    model = torch.jit.load(model_path, map_location=device)
    return model.eval(), classes

model, classes = load_model()

def predict(model, classes, image_tensor):
    """Predicts the class of an image_tensor."""

    start_time = time.time()
    predict_values = model(image_tensor)
    logger.info("Inference time: {} seconds".format(time.time() - start_time))
    softmaxed = F.softmax(predict_values, dim=1)
    probability_tensor, index = torch.max(softmaxed, dim=1)
    prediction = classes[index]
    probability = "{:1.2f}".format(probability_tensor.item())
    logger.info(f'Predicted class is {prediction} with a probability of {probability}')
    return {'class': prediction, 'probability': probability}

preprocess_pipeline = transforms.Compose([
    transforms.Resize(50),
    transforms.CenterCrop(32),
    transforms.ToTensor(),
    transforms.Normalize((0.5, 0.5, 0.5), (0.5, 0.5, 0.5))
])

def image_to_tensor(img):
    """Transforms the posted image to a PyTorch Tensor."""

    img_tensor = preprocess_pipeline(img)
    img_tensor = img_tensor.unsqueeze(0) # 3d to 4d for batch
    return img_tensor

def inference(img):
    """The main inference function which gets passed an image to classify"""

    image_tensor = image_to_tensor(img)
    response = predict(model, classes, image_tensor)
    return {
        "statusCode": 200,
        "body": json.dumps(response)
    }
The main function is called inference and we need to pass it an image and it will return the predicted class and probability / confidence of that class.
Let’s do this with flask by defining a file server.py:
import flask
from PIL import Image
import io
from prediction import inference
from flask import Flask
app = Flask(__name__)

@app.route("/", methods=["GET"])
def home():
    return "Hello World!"

@app.route("/predict", methods=["POST"])
def predict():
    data = {"success": False}
    if flask.request.files.get("image"):
        image = flask.request.files["image"].read()
        image = Image.open(io.BytesIO(image))

        result = inference(image)

        data["response"] = result
        data["success"] = True
    return flask.jsonify(data)

if __name__ == '__main__':
    app.run(host='0.0.0.0')
We define two routes: / for testing that flask is working and ready to serve and /predict as our inference endpoint. The /predict route reads a file named image, opens it with PIL and then passes it to our inference function defined above to obtain the result. So simple!
To try it out, run python server.py which will start flask on port 5000. When you open http://127.0.0.1:5000/ in your browser, you should see the Hello World! text.
To also test our /predict endpoint, we will need to generate a POST request, so we write a small function send_request.py:
import requests
import sys

API_URL = 'http://127.0.0.1:5000/predict'

def predict_result(image_path):
    image = open(image_path, 'rb').read()
    payload = {'image': image}

    r = requests.post(API_URL, files=payload).json()

    return r

img_path = sys.argv[1]
print("Checking results for {}".format(img_path))
result = predict_result(img_path)
print(result)
Test it out: python send_request.py ~/Downloads/dog.jpg - you need to pass the path to an image as a parameter.
You should get a result like this:

Example response of send_request.py
Running inside a Docker container
Alright, we defined the API, served it using Flask and tested it locally. But now, we want to do this inside Docker to have a consistent environment both for development and deployment on servers.
Let’s first pull the container image with docker: docker pull nvcr.io/nvidia/pytorch:19.04-py3.
Now we need to define our Dockerfile of the api:
FROM nvcr.io/nvidia/pytorch:19.04-py3

RUN mkdir -p /home/inference/api
WORKDIR /home/inference/api

COPY . /home/inference/api
We take the Nvidia PyTorch image of version 19.04 as the base, create a directory /home/inference/api and copy all our previously created files to that directory.
To run it, we need to map our host port to the docker port and start the Flask application with python server.py. To make this ready for further extension, we use docker compose and define a docker-compose.yml file:
version: '2.3'

services:

  api:
    container_name: api
    restart: always
    build: ./api
    runtime: nvidia
    command: python server.py
    ports:
      - "5000:5000"
When you run docker-compose up now, the container should start and you should be able to send POST requests to http://127.0.0.1/predict on your local machine which will get passed on into the docker container where the inference is done and you receive the result.
In a future post, we can extend this docker-compose file to add Nginx and Gunicorn to make it more production ready and be able to serve more than a single request at a time. Stay tuned and leave a comment if you have questions or future ideas / requests!
machinelearning deeplearning inference gpu pytorch docker flask nvidia python api
1296 Words
May 04, 2019